Table of Contents
ToggleIntroduction:
Installing a solar system is a significant decision that brings numerous benefits, from reducing electricity bills to lowering carbon footprint. However, understanding the installation process is crucial to ensure a successful and efficient solar system setup. In this guide, we will walk you through the step-by-step process of installing a solar system for your home, providing valuable insights and tips along the way.
Site Assessment:
Before starting the installation, a professional solar installer will conduct a site assessment. This involves evaluating your property’s solar potential by considering factors such as roof orientation, shading, and available space. They will also analyze your energy consumption to determine the optimal system size for your needs.
Design and System Customization:
Based on the site assessment, the solar installer will design a customized solar system for your home. This includes determining the number of solar panels, inverter capacity, and other components required to maximize energy production. They will also consider any specific preferences or requirements you may have.
Permitting and Paperwork:
To ensure compliance with local regulations, the solar installer will handle the necessary permitting and paperwork. This includes obtaining permits, submitting interconnection applications, and coordinating with the utility company to establish net metering.
Solar Panel Installation:
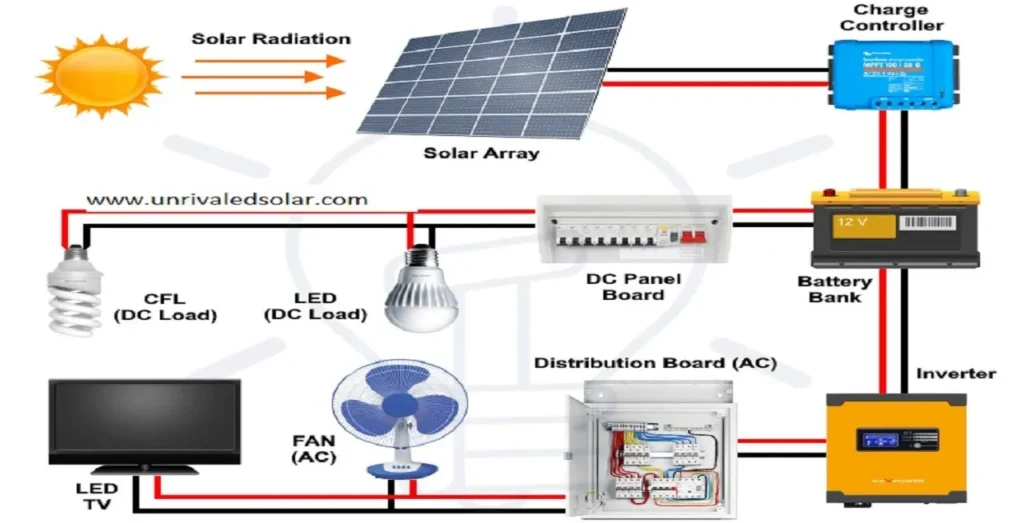
The installation process begins with mounting the solar panels on your roof or ground-mounted system. The installer will secure the panels using racks or mounting hardware, ensuring they are properly angled for optimal sunlight exposure. Wiring connections will be made between the panels, inverters, and electrical panel.
Inverter Installation:
The solar system includes inverters, which convert the DC electricity generated by the panels into AC electricity usable by your home. The inverters are typically installed near the electrical panel or in a central location. The installer will make the necessary electrical connections and ensure the inverters are properly configured.
Electrical and System Integration:
To integrate the solar system with your home’s electrical system, the installer will make the necessary connections. This may involve upgrading the electrical panel or adding a dedicated solar panel breaker. The installer will also install monitoring equipment to track the system’s performance and energy production.
Utility Inspection and Interconnection:
Once the installation is complete, the solar installer will schedule an inspection with the local utility company. This ensures that the system meets safety and code requirements. After the inspection, the utility company will establish net metering, allowing you to receive credits for excess energy fed back into the grid.
System Activation and Monitoring:
After final approval from the utility company, your solar system will be activated and ready to produce clean energy. The installer will guide you on how to monitor your system’s performance and provide any necessary maintenance or warranty information.
Conclusion:
By following these steps, you can successfully install a solar system for your home. Working with a professional solar installer ensures a seamless installation process and maximizes the benefits of solar energy. From site assessment to system activation, each step plays a crucial role in harnessing clean and renewable energy for your home. Embrace the power of the sun and contribute to a sustainable future with your newly installed solar system.
Disclaimer: The information provided in this blog is for informational purposes only and should not be considered as professional advice. It is recommended to consult with a qualified solar installer for personalized guidance and to ensure compliance with local regulations and requirements.


